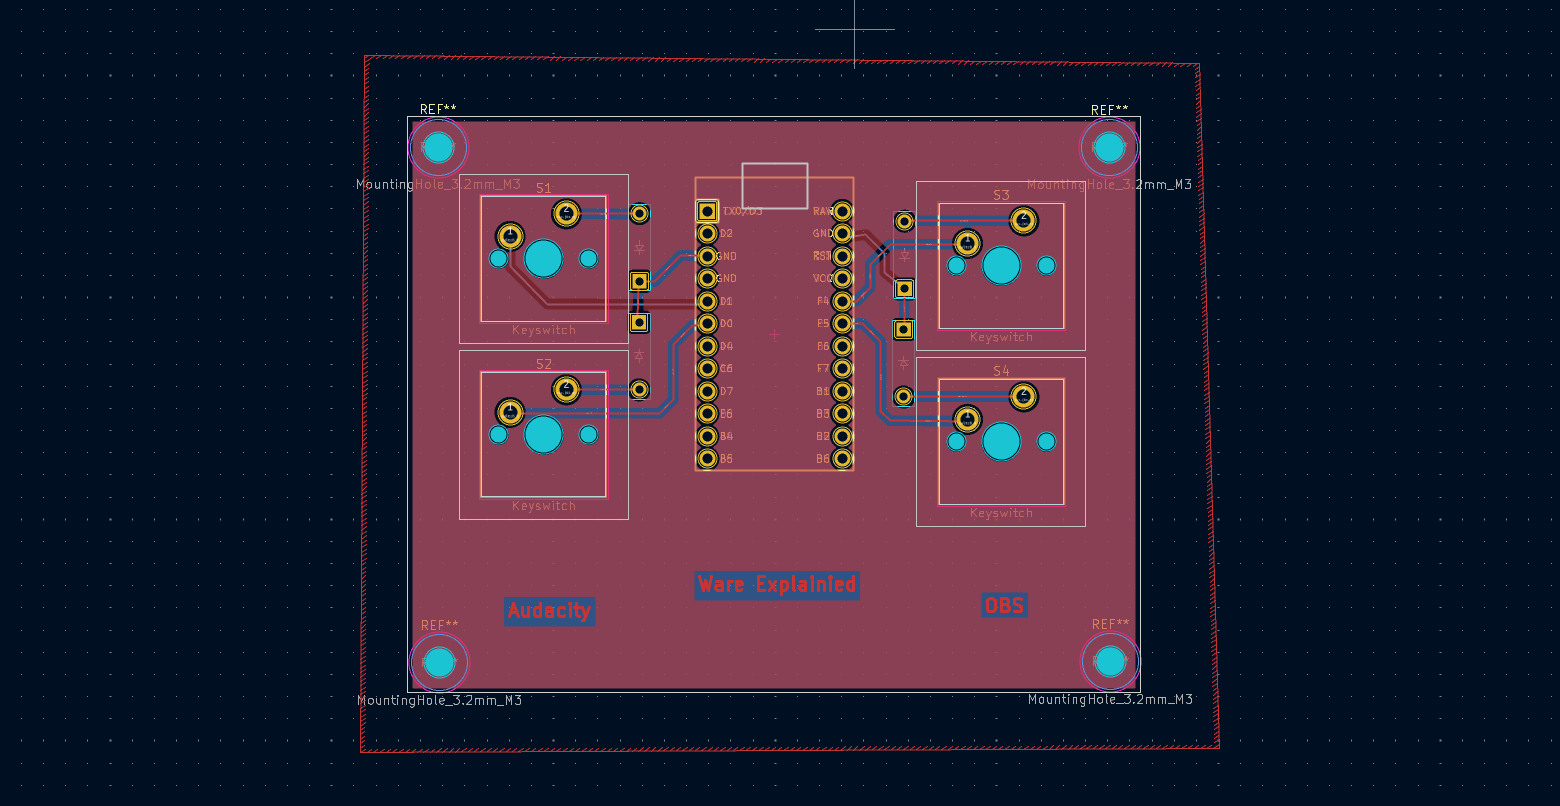
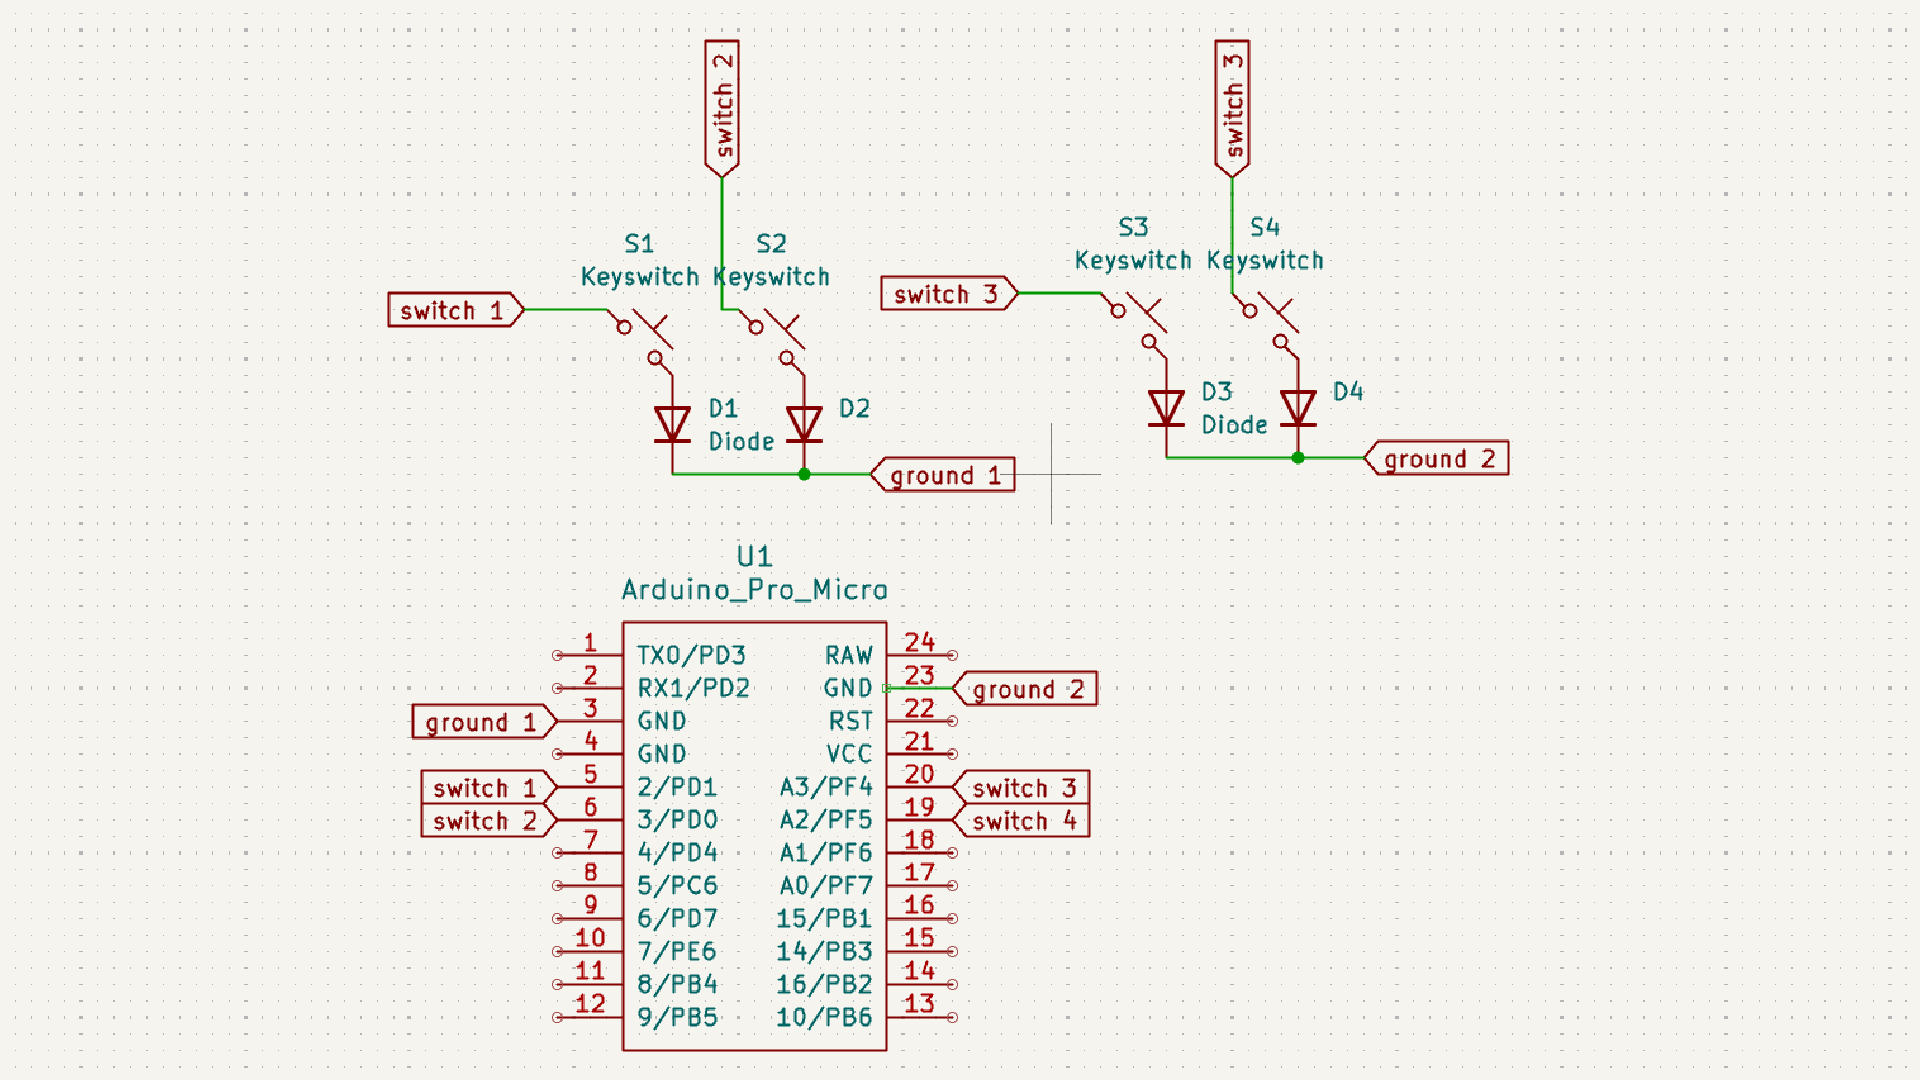
Download Kicad File containing the schematic and PCB. The zip file does not contain project backups, just everything required. Good practice would involve scanning the file.


I will be maintain a breif amount of information for all pages that require informative text. It will contain all important references.
This is my first time making a PCB and 3D-printing an object (though was terrible).
I must give credit to Joe Scotto for making a very coherent tutorial series using Kicad to create macro-keyboard PCB's
Within the PCB Design playlist, he supplies models, such as MX Switches, which have been made to corerct dimensions. This aids a lot in the macro-keyboard PCB process. It is also free.
left-cntrl + F21 is pressed by the top left key
left-cntrl + F22 is pressed by the bottom left key - it also pressed space button (which i could not make happen in ahk hence done through arduino) to stop audacity recording
left-cntrl + F23 is pressed by the top right key
left-cntrl + F24 is pressed by the bottom right key
#include <Keyboard.h>

int key1pin = 2;
int key2pin = 3;
int key3pin = A3; // pin 21
int key4pin = A2; // pin 20Key 1

void setup() {
  Serial.begin(9600);
  pinMode(key1pin,INPUT_PULLUP);
  pinMode(key2pin,INPUT_PULLUP);
  pinMode(key3pin,INPUT_PULLUP);
  pinMode(key4pin,INPUT_PULLUP);
  delay(3000);
}

void loop() {

  if(digitalRead(key1pin) == 1 || digitalRead(key2pin) == 1 || digitalRead(key3pin) == 1 || digitalRead(key4pin) == 1) {
  }

  if(digitalRead(key1pin) == 0){              //start audacity recording
    Keyboard.begin();
    Keyboard.end();
    Serial.print("Status of Key1: LOW/");
    Serial.println(digitalRead(key1pin));
    Keyboard.press(KEY_F19);
    Keyboard.releaseAll();
    delay(1000);
  }
    if(digitalRead(key2pin) == 0){            //end audacity recording
    Keyboard.begin();
    Keyboard.end();
    Serial.print("Status of Key1: LOW/");
    Serial.println(digitalRead(key2pin));
    Keyboard.press(KEY_F20);
    Keyboard.releaseAll();
    delay(100);
    Keyboard.write(0x20);
    Keyboard.releaseAll();
    delay(1000);
  }

    if(digitalRead(key3pin) == 0){            //start OBS recording
    Keyboard.begin();
    Keyboard.end();
    Serial.print("Status of Key1: LOW/");
    Serial.println(digitalRead(key3pin));
    Keyboard.press(KEY_F21);
    Keyboard.releaseAll();
    delay(1000);
  }
    if(digitalRead(key4pin) == 0){            //end OBS recording
    Keyboard.begin();
    Keyboard.end();
    Serial.print("Status of Key1: LOW/");
    Serial.println(digitalRead(key4pin));
    Keyboard.press(KEY_F23);
    Keyboard.releaseAll();
    delay(1000);
  }

}
The AHK code i see has a lot of room for optimisation, in my case it works so im fine and this is a concept project. I was not able to find out how to press space button in AHK so the way i solved it through arduino is smart.
Also I found troubles trying to launch OBS.exe so i made a shortcut hence the .lnk file extension for the variable OBSDirectory.
left-cntrl + F21 causes audacity to open and start recording
left-cntrl + F22 causes the audacity window to become first. From the arduino code, space button is pressed causing audio recording to end
left-cntrl + F23 causes OBS to open and press "r" which I have binded to run obs recording
left-cntrl + F24 pressed "p" which I have binded to make OBS end recording
#Requires AutoHotkey v2.0

AudacityDirectory := "D:\Audacity\Audacity.exe"
AudacityName := "Audacity"

OBSDirectory := "D:\obs-studio\OBS Studio (64bit).lnk"
OBSName := "OBS"

f19:: {
	if not WinExist(AudacityName) {
		Run AudacityDirectory
		return
	}
	if not WinActive(AudacityName) and WinExist(AudacityName) {
		WinWait(AudacityName)
		WinActivate
		return
	}
	if WinActive(AudacityName) {
		MsgBox "Starting Recording in .5 seconds",,"T0.5"
		Send "r"
		return
	}
}

f20:: {
	WinActivate(AudacityName)
}


f21:: {
	if not WinActive(OBSName) and WinExist(OBSName) {
		WinActivate(OBSName)
		return
	}
	if WinActive(OBSName) {
		WinActivate(OBSName)
		Send "{F22}"
		return
	}
	if not WinExist(OBSName) {
		Run OBSDirectory
		return
	}
}

f23:: {
	if not WinActive(OBSName) and WinExist(OBSName) {
		WinActivate(OBSName)
		send "{F24}"
		return
	}
	if WinActive(OBSName) {
		send "{F24}"
		return
	}
}
Download Kicad File containing the schematic and PCB. The zip file does not contain project backups, just everything required. Good practice would involve scanning the file.

